eg4 12kpv installation manual
EG4 12kPV Installation Manual Article Plan
This article provides a comprehensive guide to installing the EG4 12kPV hybrid inverter. We will cover essential aspects, from safety precautions and tool requirements to wiring connections and initial configuration. The manual aims to offer a simple, efficient way to install the 12kPV inverter.
The EG4 12kPV hybrid inverter is a versatile solution designed for residential and light commercial solar energy systems. This inverter integrates solar power conversion, battery management, and grid interaction into a single unit, offering a comprehensive approach to energy independence. It’s engineered for wall mounting, simplifying installation and saving space.
This inverter allows for seamless switching between different operating modes, adapting to varying energy needs and grid conditions. It can function in grid-tied, off-grid, and backup power modes, providing flexibility and resilience. The EG4 12kPV is compatible with 48V battery systems, including lithium-ion options like the EG4 PowerPro WallMount, enabling efficient energy storage.
With its advanced features, the EG4 12kPV optimizes solar energy utilization, reduces reliance on the grid, and ensures a stable power supply during outages. It’s a key component for those seeking to maximize the benefits of solar energy and create a more sustainable energy future. This manual will guide you through the installation process, ensuring proper setup and optimal performance.
Safety Precautions Before Installation
Prior to commencing the installation of the EG4 12kPV hybrid inverter, it is paramount to prioritize safety. Thoroughly review this section to mitigate potential hazards and ensure a secure installation process. Always adhere to all applicable national and local standards and regulations throughout the installation.
Firstly, ensure that the AC switch and/or AC breaker are in the OFF or OPEN position before initiating any work on the inverter. This will prevent accidental energization and potential electrical shock. Use a voltmeter to confirm that there is no voltage present at the inverter’s terminals before proceeding.
Secondly, never position the inverter in direct sunlight. Choose a well-shaded location or install it within a protective enclosure to shield the inverter and its LCD screen from excessive heat and UV exposure. Ensure adequate ventilation around the inverter to prevent overheating. Wear appropriate personal protective equipment (PPE), including safety glasses and insulated gloves, throughout the installation process. Disconnect all power sources before making any electrical connections. Working with electricity can be dangerous, so proceed with caution and consult a qualified electrician if needed.
Required Tools and Equipment
Before commencing the installation of your EG4 12kPV hybrid inverter, ensure you have gathered all the necessary tools and equipment. Having everything readily available will streamline the process and minimize potential delays. This section outlines the essential items required for a safe and efficient installation.
Firstly, you’ll need a comprehensive set of screwdrivers, including both Phillips head and flathead types, in various sizes. These will be essential for securing the inverter to the mounting surface and making electrical connections. A reliable wire stripper and crimper are crucial for preparing and terminating wires correctly. Ensure the wire stripper is appropriately sized for the gauge of wires you’ll be using.
A digital multimeter is indispensable for verifying voltage levels, continuity, and proper grounding. This tool will help you troubleshoot any potential issues during the installation process. You’ll also need a set of wrenches and sockets for tightening bolts and nuts. A level is necessary to ensure the inverter is mounted perfectly straight, and a measuring tape is needed for accurate measurements. Finally, don’t forget safety glasses, insulated gloves, and a suitable ladder or scaffolding if the installation requires reaching elevated locations.
Mounting the EG4 12kPV Inverter
Properly mounting the EG4 12kPV inverter is crucial for its safe and efficient operation. This section details the steps involved in securely attaching the inverter to a suitable surface, ensuring adequate ventilation and protection from the elements. The 12kPV is designed to be wall mounted using a wall mounting bracket, ensure the wall can withstand the inverters weight.

First, select a mounting location that is well-ventilated, shaded from direct sunlight, and protected from moisture. Avoid areas prone to extreme temperatures or dust accumulation. The inverter should be mounted vertically, allowing for proper airflow around the unit. Use a level to ensure that the mounting bracket is perfectly aligned horizontally before securing it to the wall.
Next, carefully lift the EG4 12kPV inverter and align it with the mounted bracket. Secure the inverter to the bracket using the appropriate screws or bolts provided. Tighten the fasteners securely, but avoid over-tightening, which could damage the inverter’s housing. Double-check that the inverter is firmly attached and cannot be easily dislodged. Ensure there is enough space for wiring.
Finally, inspect the surrounding area to ensure there are no obstructions that could impede airflow or hinder access to the inverter for maintenance. Clear any debris or materials that could pose a fire hazard. A properly mounted inverter will provide years of reliable service.
Wiring Connections: AC and DC
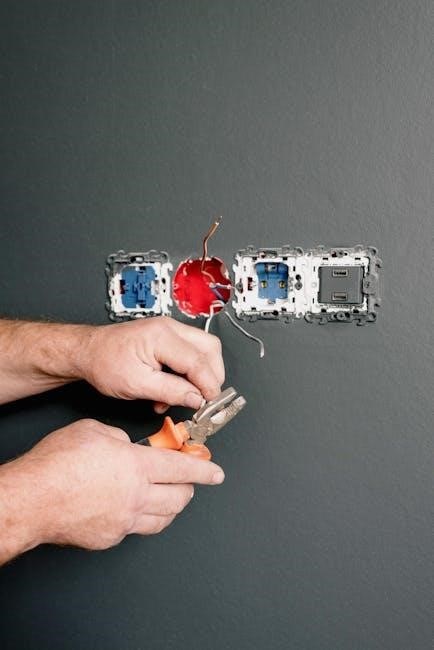
Establishing the correct AC and DC wiring connections is paramount for the EG4 12kPV inverter to function safely and effectively. This section outlines the procedures for connecting both AC and DC power sources to the inverter, emphasizing safety precautions and adherence to electrical codes.
Before commencing any wiring work, ensure that the AC switch and/or AC breaker are in the off position, and use a voltmeter to confirm there is no voltage present. Begin with the DC connections, connecting the solar panel array to the inverter’s DC input terminals. Pay close attention to polarity, ensuring that positive (+) and negative (-) wires are correctly matched to the corresponding terminals. Use appropriately sized wiring and secure all connections tightly.
Next, proceed with the AC connections, which involve connecting the inverter to the grid and the load center panel. The EG4 12kPV is designed to be connected to a 100amp grid feed from house into the EG4, connect my 100amp load center panel to the EG4. Ensure the AC switch and/or AC breaker are in the off or open position before installing or working on the inverter. Use a voltmeter to confirm there is no voltage there.
After completing all wiring connections, thoroughly inspect each connection to ensure it is secure and properly insulated. Use a torque screwdriver to secure the connection. Double-check polarity and wiring configurations before energizing the system. Consult a qualified electrician if you have any doubts or concerns about the wiring process.
Battery Connection and Configuration
Connecting the battery system correctly is crucial for the EG4 12kPV inverter to operate in backup mode and store excess solar energy. This section provides a step-by-step guide to connecting and configuring batteries with the inverter, ensuring optimal performance and safety.

Before starting, verify that the EG4 12kPV inverter is compatible with your chosen battery type, such as the EG4 PowerPro WallMount AllWeather Lithium Battery 48V 280Ah LiFePO4. Ensure the inverter’s voltage settings are appropriately configured for your battery system. Disconnect all power sources from the inverter before proceeding.
Connect the battery cables to the inverter’s battery terminals, paying close attention to polarity. The positive (+) cable should connect to the positive terminal, and the negative (-) cable should connect to the negative terminal. Use appropriately sized cables and torque the connections to the manufacturer’s specifications. Verify that all connections are tight and secure.
Once the physical connections are complete, configure the inverter’s battery settings. Input the battery’s capacity, voltage, and charging parameters into the inverter’s settings menu. Consult the battery manufacturer’s specifications for recommended settings. Monitor the battery’s performance during initial operation, ensuring that it charges and discharges correctly. Make adjustments to the settings as needed to optimize performance and prolong battery life.

Grid Connection and Considerations
Connecting the EG4 12kPV inverter to the utility grid requires careful planning and adherence to local regulations. This section covers the essential steps and considerations for grid connection, ensuring safe and compliant operation.
Before connecting to the grid, consult with your local utility company to understand their requirements and obtain any necessary permits. The installation must follow all applicable national or local standards and regulations. Ensure that the inverter is certified and approved for grid-tied operation in your region.
The EG4 12kPV inverter is designed to be connected to the grid via a dedicated breaker. Install a suitable breaker in your main service panel, following the National Electrical Code (NEC) guidelines, specifically 2023 NEC Code 705.11. Use appropriately sized wiring and conduit to connect the inverter to the breaker.
When connecting the inverter to the grid, ensure that the AC switch or breaker is in the off or open position. Verify that there is no voltage present on the grid wires before making any connections. After connecting, double-check all wiring and connections to ensure they are secure. Finally, confirm the settings of the inverter.
Initial Startup and Configuration
After completing the wiring and connections, the next step is the initial startup and configuration of the EG4 12kPV inverter. This process involves powering on the inverter, verifying its operation, and configuring essential settings to match your system and needs.
Before powering on the inverter, double-check all wiring connections, including AC, DC, and battery connections. Ensure all breakers and switches are in the correct position. Once you are confident that all connections are secure, turn on the AC and DC breakers to supply power to the inverter.
Upon powering on, the inverter’s LCD screen will display information. Verify the voltage and frequency are correct. Also, check for any error messages. If you see an error, consult the troubleshooting section of this manual. If no errors are present, proceed to configure the inverter settings.
The EG4 12kPV inverter has several configurable parameters, including battery charging settings, grid-tie settings, and operating modes. Adjust these settings according to your specific requirements. These settings may need to be adjusted by the installer after installation, and once 24 hours later to ensure optimal performance and efficiency.
Operating Modes and Settings Adjustment
The EG4 12kPV inverter offers multiple operating modes to cater to different energy needs and grid conditions. Understanding and adjusting these settings is crucial for optimizing system performance.
The EG4 12kPV can work in several different modes of operation. The available modes might include grid-tie, off-grid, and hybrid modes. In grid-tie mode, the inverter primarily supplies power to the load from solar panels and supplements it with grid power when needed. Off-grid mode relies entirely on solar and battery power, disconnecting from the grid. Hybrid mode intelligently combines grid, solar, and battery power to optimize energy usage and cost savings.
Settings such as battery charge rates, low-voltage disconnect points, and grid export limits can be configured through the inverter’s interface. These parameters allow you to tailor the system behavior to your specific energy needs and grid requirements.
Regularly monitoring and adjusting these settings can enhance the overall efficiency and longevity of your solar power system. Keep in mind that adjustments might be needed based on seasonal changes, energy consumption patterns, and utility grid policies.

Troubleshooting Common Issues
Even with careful installation and configuration, occasional issues may arise with the EG4 12kPV hybrid inverter. This section provides guidance on troubleshooting common problems to ensure optimal performance and minimize downtime.
One frequent issue is communication errors between the inverter and other components, such as batteries or solar panels. Check all wiring connections for tightness and proper polarity. Ensure that the communication cables are securely connected and undamaged. Verify that the communication protocols and settings are correctly configured in the inverter’s interface.
Another common problem involves low power output from the solar panels. Inspect the panels for shading, dirt, or damage. Use a multimeter to measure the voltage and current output of each panel to identify any malfunctioning units. Check the string configuration to ensure it matches the inverter’s specifications.
If the inverter displays error codes, consult the manufacturer’s documentation or online resources for detailed explanations and troubleshooting steps. Resetting the inverter and updating the firmware can sometimes resolve minor software glitches. If the issues persist, contact a qualified solar technician for professional assistance.