
emacros driveway alarm user manual
Emacros Driveway Alarm User Manual: A Comprehensive Guide (Updated 02/26/2026)
Welcome! This manual details the eMACROS solar driveway alarm, covering installation, operation, and troubleshooting, with alerts potentially reaching half a mile.
Thank you for choosing the Emacros Driveway Alarm System! This wireless, solar-powered system is designed to provide you with peace of mind by alerting you to the presence of vehicles or people on your property. This system offers a long-range detection capability, potentially reaching up to half a mile, making it ideal for larger properties or those with limited visibility.
This user manual will guide you through every step, from unboxing and installation to operation and troubleshooting. We’ll cover optimal sensor placement, pairing procedures, sensitivity adjustments, and maximizing the solar charging capabilities. Understanding these features will ensure reliable performance and minimize false alarms. We aim to empower you with the knowledge to fully utilize the system’s potential and safeguard your home or business effectively.
What’s Included in the Box?
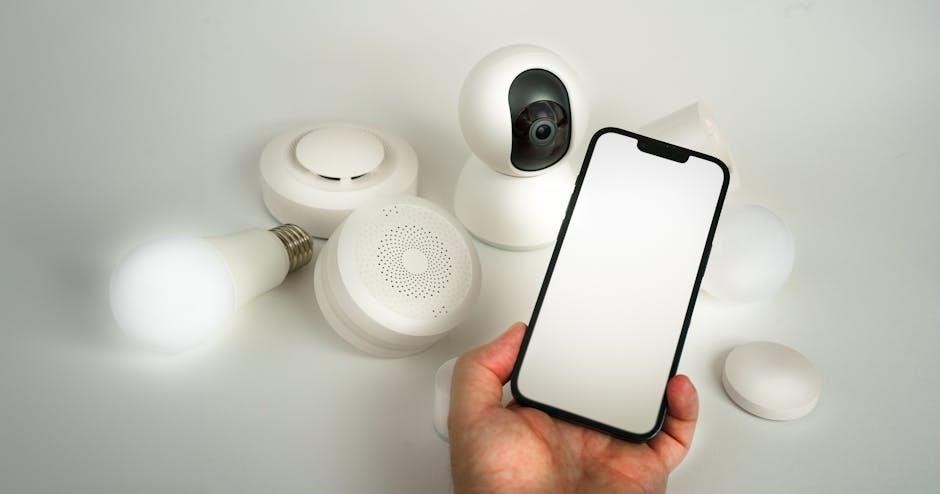
Upon opening your Emacros Driveway Alarm System package, please verify that all components are present. You should find one (1) Wireless Motion Sensor, the core detection unit powered by a solar panel. Also included is one (1) Receiver Unit, responsible for receiving signals from the sensor and providing audible and visual alerts.
Additionally, you’ll receive a Mounting Bracket and associated Screws for secure sensor installation. A User Manual (that’s this document!) is provided for comprehensive guidance. Finally, there’s a Rechargeable Battery for the sensor, offering a backup power source. If any items are missing or damaged, please contact our customer support team immediately for assistance. Careful inventory ensures a smooth setup process.
System Overview & Components
The Emacros Driveway Alarm System is a wireless, solar-powered security solution designed to alert you to approaching vehicles or individuals. The system comprises two primary components: a Wireless Motion Sensor and a Receiver Unit. The sensor utilizes passive infrared (PIR) technology to detect movement and transmits a signal up to half a mile.
The Receiver Unit decodes this signal, activating a loud audible alarm and visual indicator. It operates on a selectable channel, allowing for multiple sensors. The system’s solar panel keeps the sensor charged, with a rechargeable battery providing backup. Effective range depends on terrain and obstructions. Understanding these components is key to optimal performance and security.

Installation & Setup
Begin installation by carefully selecting a location for the sensor, ensuring optimal detection range and pairing it with the receiver unit for seamless operation.
Choosing the Optimal Location for the Sensor
Strategic placement is crucial for maximizing the effectiveness of your Emacros driveway alarm. The sensor should be positioned facing the direction of approaching vehicles, ideally perpendicular to the driveway. Avoid obstructions like trees, bushes, or large objects that could interfere with the detection zone.
Consider the range – testing at up to half a mile is possible – and ensure a clear line of sight. Mounting the sensor at a height of approximately 3-4 feet generally provides the best results. Avoid pointing the sensor directly at the sun, as this can trigger false alarms due to heat detection.
Experiment with slightly different locations during initial setup to fine-tune performance and minimize potential issues. A stable, secure mounting surface is also essential for reliable operation and preventing accidental displacement.
Pairing the Sensor with the Receiver
Establishing a connection between your Emacros sensor and receiver is a straightforward process. First, ensure the receiver is powered on and in pairing mode – typically indicated by a flashing LED. Next, activate pairing mode on the sensor itself; consult the sensor’s specific instructions for the exact method, as it may involve pressing a button or switch.
Bring the sensor relatively close to the receiver during the pairing process, generally within 10-15 feet. The receiver should then detect the sensor and establish a secure wireless link. A successful pairing is usually confirmed by a solid LED indicator on the receiver.
If pairing fails, repeat the process, ensuring no other wireless devices are causing interference. Refer to the troubleshooting section if issues persist.

Powering the System: Solar Panel & Battery Options
The Emacros driveway alarm utilizes a solar panel for primary power, supplemented by battery backup for consistent operation, even during periods of limited sunlight. The solar panel efficiently converts sunlight into energy, charging the internal rechargeable battery.
For optimal performance, position the solar panel facing south, ensuring it receives maximum sunlight exposure throughout the day. The system automatically switches to battery power when solar energy is insufficient. Battery life varies depending on usage and sunlight availability, but typically provides several days of operation on a full charge.
Regularly check the battery status via the receiver unit. Consider replacing the battery every 1-2 years for peak performance.
Adjusting the Sensor Sensitivity
The Emacros driveway alarm features adjustable sensitivity settings to minimize false alarms and optimize detection accuracy. Lower sensitivity settings are ideal for areas with frequent pedestrian or animal traffic, reducing the likelihood of unnecessary alerts. Higher sensitivity settings are suitable for larger driveways or areas where detecting even small movements is crucial.
To adjust the sensitivity, access the settings menu on the receiver unit. Experiment with different levels to find the optimal balance between detection range and false alarm prevention. Start with a medium setting and gradually adjust as needed based on your specific environment.
Remember to re-evaluate sensitivity after significant weather changes or alterations to the surrounding landscape.
Understanding the Receiver Unit
The receiver displays alerts and allows customization of your Emacros system; volume, tone, and channel selection are key features for optimal use.
Receiver Display & Indicator Lights
The receiver’s display provides crucial system status information at a glance. A prominent signal strength indicator visually represents the connection quality with the paired sensor, ensuring reliable alert transmission. Battery level indicators, for both the receiver itself and the connected sensor, prevent unexpected downtime.
Indicator lights offer immediate feedback. A flashing “Sensor” light confirms successful pairing and ongoing communication. The “Alert” light illuminates and often sounds an alarm when motion is detected, signaling potential activity on your property. A low battery indicator will flash, prompting timely replacement or solar charging. Understanding these visual cues is essential for effective system monitoring and proactive maintenance, guaranteeing your driveway alarm functions optimally and provides consistent security.
Volume Control & Tone Selection
Adjusting the receiver’s volume is straightforward, allowing you to customize the alert level to suit your environment and hearing preferences. A rotary dial typically controls the volume, ranging from silent to a loud, attention-grabbing alarm. Consider your surroundings – a quieter setting may require higher volume, while a busier area might benefit from a moderate level.
Tone selection offers further customization. Many Emacros models feature multiple alert tones, enabling you to differentiate between sensors if you have a multi-sensor system. Experiment with the available tones to find one that is easily recognizable and distinct from other household sounds. Proper volume and tone configuration ensures you’ll always be promptly notified of potential driveway activity, maximizing the system’s effectiveness.
Channel Selection & Multiple Sensors
Expanding your security with multiple Emacros sensors is easily achievable through channel selection. Each sensor needs to be assigned a unique channel on the receiver unit to allow for individual identification of the triggering location. This prevents confusion and allows you to pinpoint exactly which part of your property is experiencing activity.
The receiver typically features multiple channel buttons or a channel selection menu. During sensor pairing (refer to the ‘Pairing the Sensor with the Receiver’ section), each sensor is assigned a specific channel. Correct channel assignment is crucial for accurate monitoring. Utilizing multiple sensors and distinct channels provides comprehensive coverage and enhanced security for larger properties, offering peace of mind and detailed awareness.
Alert Range & Factors Affecting Performance
The Emacros driveway alarm boasts a potential alert range of up to half a mile in optimal conditions, providing substantial coverage for larger properties. However, several factors can significantly impact performance and reduce this range. Obstructions like trees, buildings, and even dense foliage can weaken the wireless signal between the sensor and the receiver.
Weather conditions, including heavy rain or snow, can also interfere with signal transmission. Interference from other wireless devices operating on similar frequencies may also contribute to reduced range. Proper sensor and receiver placement, minimizing obstructions, and avoiding sources of interference are vital for maximizing the system’s effective range and ensuring reliable alerts.

Operation & Troubleshooting
Ensure proper function by testing after installation; address false alarms promptly. Common issues include signal loss and low battery, requiring immediate attention.

Testing the System After Installation
Initial System Check: Following installation, thoroughly test your Emacros driveway alarm to confirm optimal functionality. Begin by walking towards the sensor at varying speeds and distances, observing the receiver unit for immediate alerts. Verify the alert range aligns with your expectations, keeping in mind potential interference factors.
Range Verification: System performance can reach up to half a mile, but actual range depends on terrain and obstructions. Test from the furthest anticipated detection point. Note any signal weaknesses.

Sensitivity Adjustment: If the system is overly sensitive or fails to detect movement, revisit the sensitivity settings (detailed in the ‘Adjusting the Sensor Sensitivity’ section) and fine-tune for accurate detection. Consistent testing ensures reliable performance and peace of mind.
False Alarm Prevention & Mitigation
Minimizing Unwanted Alerts: False alarms can be frustrating. To reduce their occurrence, ensure the sensor isn’t pointed towards areas with frequent, non-threatening movement – like roads or waving trees. Adjusting the sensor sensitivity is crucial; lower settings reduce reactivity to minor disturbances.
Environmental Factors: Weather conditions, particularly strong winds or heavy rain, can sometimes trigger false alerts. Consider the sensor’s placement to shield it from direct exposure. Regularly inspect the area for new obstructions.
Detection Zone Refinement: Utilize the adjustable detection zones (see ‘Adjusting Detection Zones’) to focus the sensor’s attention on the desired area, ignoring irrelevant motion. Consistent monitoring and adjustments will optimize performance.
Troubleshooting Common Issues: No Signal
Addressing Signal Loss: If the receiver isn’t receiving a signal from the sensor, first verify both units have sufficient power – check battery levels and solar panel exposure. Ensure the sensor and receiver are within the specified wireless range (see ‘Understanding the Wireless Range Limitations’).
Obstruction Check: Physical obstructions like buildings, trees, or metal structures can interfere with the wireless signal. Try repositioning the receiver or sensor to minimize these obstacles. Interference from other wireless devices is also possible.
Re-Pairing: If repositioning doesn’t help, attempt to re-pair the sensor with the receiver (refer to ‘Pairing the Sensor with the Receiver’). A fresh connection can often resolve signal issues.
Troubleshooting Common Issues: Low Battery
Battery Concerns: A low battery in either the sensor or receiver can cause intermittent operation or a complete system failure. Regularly check the battery level indicators on both units. If the battery is low, replace it with a fresh set of batteries of the correct type, as specified in ‘Battery Replacement Procedures’.
Solar Charging Issues: If using the solar panel, ensure it’s receiving adequate sunlight. Clean the solar panel surface regularly to maximize energy absorption (see ‘Solar Panel Maintenance’). Cloudy weather can reduce charging efficiency.
Power Saving Mode: Some models feature a power-saving mode; verify this isn’t activated unintentionally, as it may limit functionality. Consistent low battery warnings indicate a potential issue with the battery or solar charging.
Advanced Features & Customization
Explore options! Customize detection zones, utilize multiple sensors for broader coverage, and understand wireless range limits for optimal performance and security.
Adjusting Detection Zones
Fine-tune your security! The Emacros driveway alarm allows for customized detection zones, minimizing false alarms triggered by passing pedestrians, animals, or roadside activity. Access the zone settings through the receiver unit’s menu, typically navigated using the ‘Menu’ and ‘Set’ buttons.
You can define specific areas the sensor monitors by adjusting the sensitivity levels within designated zones. Experiment with different settings to pinpoint the precise area you want to protect. Consider factors like driveway width, landscaping, and potential obstructions.
Reducing the detection zone minimizes unwanted alerts, while expanding it increases coverage. Regularly review and adjust these zones based on seasonal changes or alterations to your property. A properly configured detection zone ensures reliable and accurate driveway monitoring.
Using Multiple Sensors for Extended Coverage
Expand your perimeter! For larger properties, utilizing multiple Emacros sensors significantly enhances your driveway security coverage. Each sensor can be individually paired with the receiver unit, allowing for distinct monitoring zones. Assign unique channels to each sensor via the receiver’s settings menu – a crucial step for differentiating alerts.
Strategically position sensors to cover all potential entry points, including driveways, gates, and walkways. Consider overlapping coverage areas to eliminate blind spots. Ensure sensors are within the receiver’s wireless range for optimal performance.
The receiver will clearly indicate which sensor triggered the alarm, providing precise location information; Regularly test each sensor to confirm functionality and maintain a robust security system.
Understanding the Wireless Range Limitations
Maximize signal strength! The Emacros driveway alarm boasts a substantial wireless range, potentially reaching up to half a mile in optimal conditions. However, several factors can impact performance. Physical obstructions like buildings, trees, and dense foliage significantly reduce range. Metal structures are particularly disruptive to the wireless signal.
Interference from other wireless devices operating on similar frequencies can also limit range. Maintaining a clear line of sight between the sensor and receiver is ideal.
Test the system thoroughly after installation to verify adequate coverage throughout your property. Consider relocating the receiver if signal strength is weak in critical areas. Remember, stated range is a maximum; real-world performance varies.
Optimizing Solar Panel Exposure
Harness the sun’s power! The Emacros driveway alarm utilizes a solar panel for extended, wireless operation. To maximize charging efficiency, ensure the panel receives direct sunlight for at least 6-8 hours daily. Avoid shading from trees, buildings, or other obstructions. Regularly clean the solar panel surface with a soft, damp cloth to remove dirt, dust, and debris.
Panel angle is crucial; adjust it seasonally to align with the sun’s path. South-facing exposure (in the Northern Hemisphere) generally yields the best results.
Even on cloudy days, the panel will continue to charge, albeit at a reduced rate. Monitor battery levels periodically to confirm sufficient solar intake.

Maintenance & Care
Keep it running smoothly! Regular cleaning of the sensor and receiver, alongside proper battery and solar panel upkeep, ensures optimal performance and longevity.
Cleaning the Sensor & Receiver
Maintaining optimal performance requires periodic cleaning. For both the sensor and receiver units, use a soft, damp cloth to gently wipe away any dirt, dust, or debris. Avoid using harsh chemicals, abrasive cleaners, or high-pressure water, as these can damage the components. Pay particular attention to the sensor lens, ensuring it is free from obstructions that could interfere with detection.
Regularly inspect the receiver’s speaker grill for dust accumulation, which can muffle the alert sound. A soft brush can be used to carefully remove any buildup. For stubborn grime, lightly dampen the cloth with a mild soap solution, but always ensure it is thoroughly wrung out before use. Never submerge either unit in water. Allow both components to completely dry before re-operation to prevent potential electrical issues.
Battery Replacement Procedures
To ensure continuous operation, periodically replace the batteries in both the sensor and receiver. First, power off the unit. For the sensor, locate the battery compartment (typically secured with screws). Remove the old batteries, noting the correct polarity (+ and -). Insert new, high-quality alkaline batteries of the specified type. Securely close the battery compartment.
The receiver also has a battery compartment; follow the same procedure. Always replace batteries in pairs for optimal performance. Dispose of old batteries responsibly, following local regulations. Low battery indicators on the receiver signal the need for replacement. After replacing batteries, power on the system and re-test functionality. Incorrect battery installation can cause damage; double-check polarity before closing compartments.
Solar Panel Maintenance
Maintaining the solar panel is crucial for reliable, long-term performance of your Emacros driveway alarm. Regularly clean the solar panel surface with a soft, damp cloth to remove dust, dirt, and debris. Avoid using abrasive cleaners or harsh chemicals, as these can damage the panel’s protective coating. Inspect the panel for any physical damage, such as cracks or scratches.
Ensure the panel receives ample sunlight throughout the day; trim any nearby vegetation that may cause shading. Optimizing solar exposure maximizes battery charging efficiency. Periodically check the connection between the solar panel and the sensor unit to ensure a secure fit. A loose connection can hinder charging. Proper maintenance extends the lifespan of the solar panel and ensures consistent operation.
Long-Term Storage Guidelines
If storing your Emacros driveway alarm for an extended period, proper preparation is essential to maintain its functionality. Before storage, fully charge the system’s battery to prevent degradation. Remove the batteries from both the sensor and receiver units if storage will exceed three months, to avoid potential leakage and corrosion. Store the sensor and receiver in a cool, dry place, away from direct sunlight and extreme temperatures.
Protect the components from moisture and dust. Consider storing them in their original packaging or sealed plastic bags. Periodically check the battery charge level if batteries are left installed during storage. Recharge as needed. Following these guidelines ensures your Emacros system will be ready for immediate use when you need it.

Safety Information & Warranty
Please read carefully! This system is designed for security; improper use voids the warranty and may cause harm. Contact support with questions.
Important Safety Precautions
Caution: To ensure safe and effective operation of your Emacros Driveway Alarm, please adhere to the following precautions. Avoid installing the sensor in areas prone to accidental impact, as damage could occur. Do not attempt to disassemble or modify the sensor or receiver unit; this will void the warranty and may present a safety hazard.
Keep the system away from extreme temperatures and direct water exposure, even with the solar panel’s weather resistance. Regularly inspect the wiring and connections for any signs of damage. This device is intended for outdoor use only, and should not be submerged. Ensure the receiver is placed in a dry, easily accessible location.
Always test the system after installation to confirm proper functionality. Be mindful of the alert volume to avoid startling individuals or disturbing neighbors. If you experience any unusual behavior, discontinue use and contact customer support immediately. Prioritize safety during installation and maintenance.
Warranty Information & Contact Details
Warranty Coverage: Your Emacros Driveway Alarm is covered by a one-year limited warranty against defects in materials and workmanship from the date of purchase. This warranty does not cover damage resulting from misuse, abuse, accidents, modifications, or natural disasters. Proof of purchase is required for all warranty claims.
To initiate a warranty claim, please contact our customer support team with details of the issue and your order number. We will provide instructions for returning the product for inspection or replacement.
Contact Information: For technical support, troubleshooting assistance, or warranty inquiries, please reach out to us via email at support@emacrosalarms.com or call us at 1-800-EMACROS (1-800-362-2767). Visit our website at www.emacrosalarms.com for FAQs and additional resources.